How to set custom dates in reports and on the dashboard
Instructions for setting custom dates in reports, changing dashboard dates, and configuring reporting timeframes.
Written by Srishti
Updated over
2 weeks ago
How to set custom dates in reports and on the dashboard
There are several ways you can set up your dates in reports and on the dashboard in Brixx. The drop down options are Yearly, All Years and Custom Dates.
If you want to generate reports for very specific time intervals, maybe you want to see the P&L or Cash Flow for only two months, or for one year and a half, you would use Custom Dates.
How do I set up a custom date?
- Click on the time range drop down either in the Dashboard or Report screen, and select the “Custom Date” option. NOTE: The custom date range only gets saved in the section you create it in. This means you can have it only in Report, only in Dashboard or you have to create it in both.

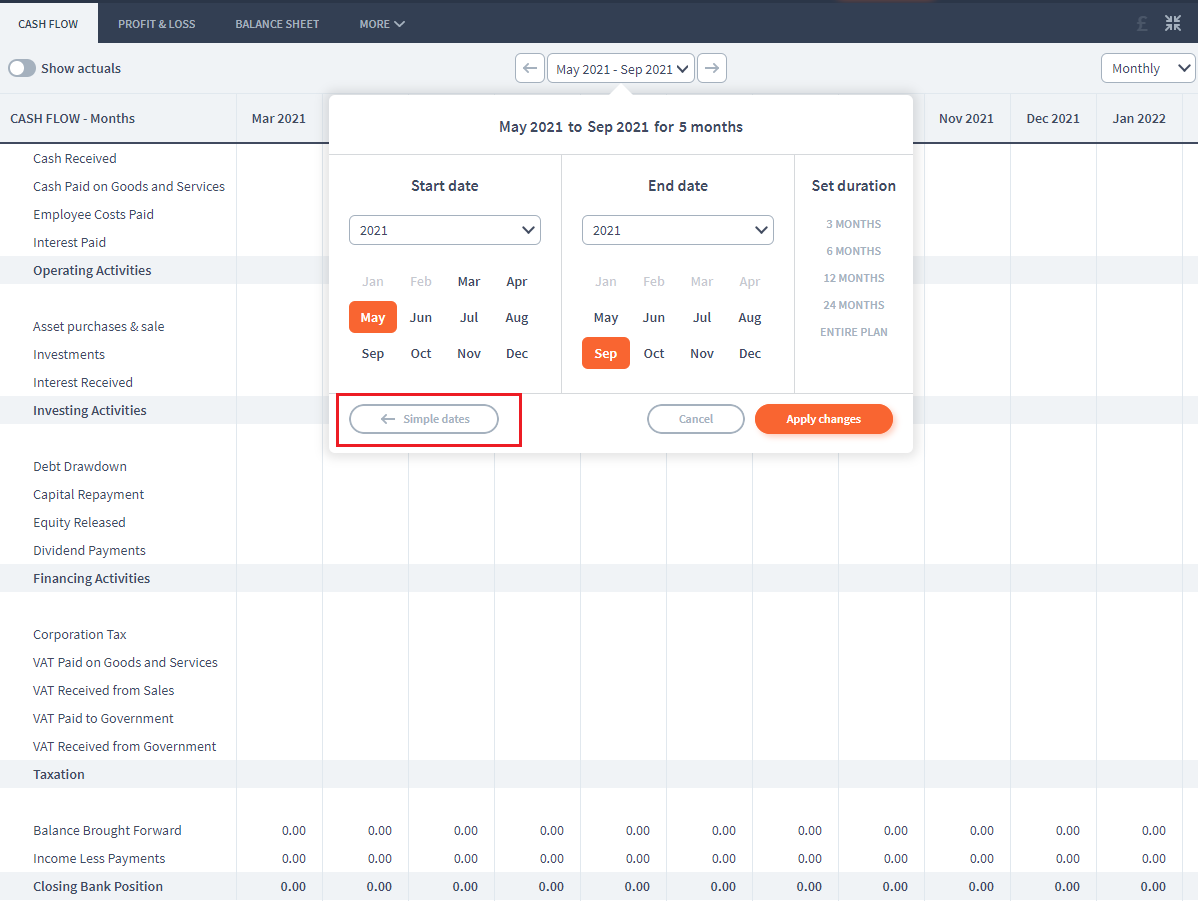
- A custom dates tab will open, where you can manually select any time range you want by selecting a Start Date and an End Date.

-
Once you have set up the time period, click on the “Apply Changes” button
Going back to yearly dates
To return back to the yearly dates, click the time range drop down again. This time, the custom dates tab will open automatically
Click on the Simple Dates button in the lower left of the Custom Dates tab, and you will revert back to yearly ranges, removing the previous custom date range.
Did this answer your question?


